Sunday, July 31, 2016

The 2016 MarkKart - Final Design

So putting to all together.......

After getting the motors figured out, the frame's paintjob has dried and my parts from cerakoting has come back it was time for assembly.... like the day before I had to leave for Makerfaire...

... I also have a history of building things in hotel rooms.... oh wait....


That looks like a hotel room floor.... hehe..... drive module 1 assembled! Thank god for CAD and precision fabrication with some careful (IE force it cause clearance holes are for wussys) assembly almost for everything went together perfectly.

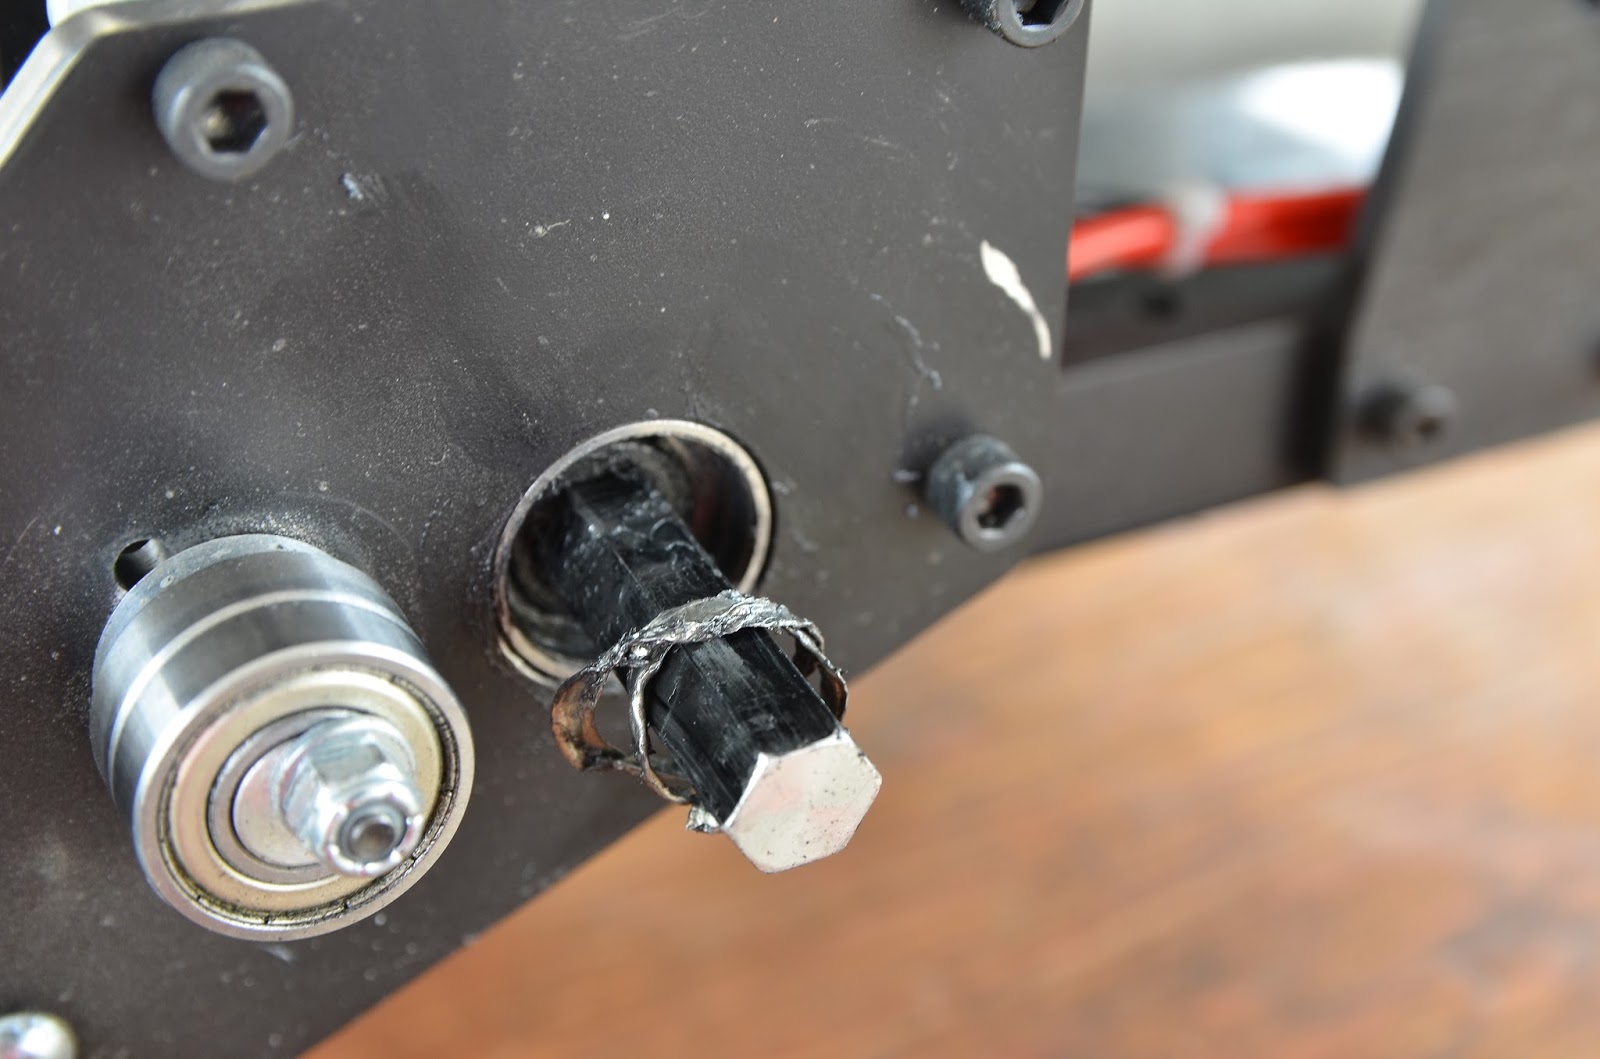
Now to back up a bit, in the design one sees a belt but what one does not see in the picture is the idler on the bottom of the belt that keeps it in tension. Which is a 3D printed shelve over a needle bearing that spins on a shaft that sticks out from the gearbox.


Now I did dumb and somehow lost one of the needle bearings oops.... lucky I caught this before driving up to SF so I was able to make a pit stop at the LA McMaster-Carr to pick up another one. (Saved on shipping at least...).

And into the whee hours hours of the night assembly happened, and wiring was started.....

After a bit... the entire frame was mechanically assembled including steering linkages, drive modules and wheels. You can see the electronics being laid up in the photos above. The ammo can on the left houses the batteries, because PRS legalized Lithium batteries of any times I was able to use my staple aircraft LiPos! 


Each can houses 3 4S 16AH very china craft LiPos, wired in series to give me 12S (48v) 16AH. These are some of the cheapest and highest energy dense batteries you can get, with a small (for lipo) 10C discharge rating. Abit that still means this pack can dump 160amps continuously at 48v....

As we all know LiPos have a nasty habit of exploding into fireballs so a few buckets of sand were obtained from the local homedepot. At this point I don't really have many photos, after some emergency runs to home depot and such for screws and misc hardware. And some panicking and guessmated sensor timing...

IT'S DONE AND OMFG IT WORKSSSSS


... and holy shit it's fast.


Cause I am NOT a EE or CS person in anyway of the world, the electronics were simple and only took 2-3 hours of work to wire up. Basically LiPos connected into big switch, which went to the PRS fuse and then a terminal block to be able to split off into the ESCs.

Now the ESCs are what has made the history MarkKarts so deadly. Legit Kelly KBS 48v 50amp sensored brushless EV controllers with highspeed FW. These are actual legit EV designed speed controllers, unlike the brushless RC controls and "jasontrollers" used by many. And in my history they have been rock solid and burned a few 63mm sized motors to the ground. With a known history of being diffcult to drive the Melon was a worthy contender. But after wiring them up and doing some phase finding and sensor tuning with an amp clamp, they ran flawlessly throughout the weekend.

Now PRS has this pesky 1440watt power limit, physically mandated by a fuse. They controllers are rated at 50 amp contentious each, so with two of them and huge melons (ha) 48v * 50amp * 2 = 4800watts.... so that wouldn't have worked. So after some testing I ended up setting the controllers to run around 35% of there available amperage output to keep the fuse happy, this ended up being a little slower then I would have wished for but still plenty fast. 

This took up the first day of the Makerfaire which no offical races were schedule for. Over the weekend Saturday and Sunday we had to go though a time trial, two 15 minute races, and one 75 minute endurance race. 

Unforantly I have basically no photos or videos of any of the races myself... was a bit to busy working on the kart and making sure it stayed working to really get any media. Here's a video after the fact doing some fun testing. 


Anyways with everything running it was time for racessssssss.

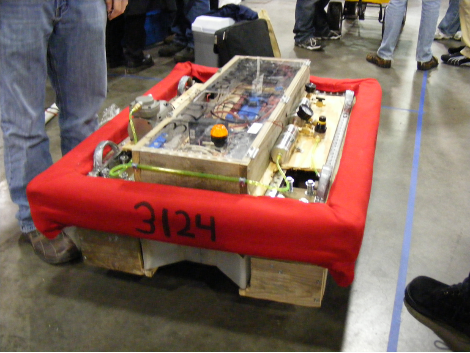
And with no media content it makes this section kinda boring but suffice to say MarkKart did okay ish. Ended up placing 4th in EVERYTHING. Ended up with a result of 4th place in race points and very little moxie as I didn't have a body....

WAIT... this is "power wheels" racing series... yeah... as part of my shamefulness I wasn't able to get a body built in time so I was a "naked" racer. Which is allowed sometimes when there is a lack of cars, which has always been a problem at the SF race. 

The biggest flaw was always me, and for once not my engineering but my driving. Which to be honest I didn't really care about placement in the races so I didn't push as hard as I could have all the time. In addition the razer ground force seat was hellish uncomfortable and I kept sliding out of it which left my in pain after awhile cause I was holding myself in.

But another Makerfaire wrapped up. Lots of fun had, and lessons learned for next time.

Saturday, June 11, 2016

The 2016 MarkKart - Power

So the next installment of Markkart 2016..... powerrrrrrrrr (c) Jeremy Clarkson. 

We're going backtrack a bit, months ago I had a friend hanging out in the China and I realized I could leverage something that most people in American can. Taobao! And specifically all the sketchy random motor vendors on Taobao! But if you clicked on the link you're probably going wait... whut....

(page translated via google) 
What the front page looks like
 But if we key in some strategic Chinese characters we get:

Much better.....
Taobao is probably the biggest internal Chinese vendor site, containing just about everything you can think about. From consumer goods, fashion, to sketch motors and electronics to some really legit goodies direct from name brand manufacturers. And yes I did say internal for the most part vendors will only ship within China, and don't speak much English. Aliexpress is the site that sends Chinese stuff to America but you often have higher prices, and longgg lead times to deal with (with a lot of broken English).

So anyways to what I was looking for: big brushless motors, Markkart has generally ran Hobbyking SK3 "63mm" (really 59mm) out-runners of various KVs. Problem is these were becoming an expensive diet at $80 a pop and often out of stock.... (Charlessssss) and  I burned up a few. So instead of being a good engineer and doing math I figured I might as well go find the biggest brushless outrunners you can get in China....

Meet the Melon (C) Charles Guan

Melon.
This beast is an 80mm Brushless outrunner rated at 180kv with a factory spec of up to 48v. And in stock form is capable of dumping out 5-6KW. The term "Melon" coined by Charles in reference to it being about the size of a melon. They used to be sold on Hobbyking for about $100 known as a "C80" but long since discounted. The only place that carry them in the USA are e-bike shops and those go for over $180.

Browsing the Taobaos I figured if I could find the sketchy Chinese factory that made them a cheap source of them would be nice, and after much googling and searching I found a vendor that had a batch of "blemished" units for real cheap. (To cheap to show! Add to kart for price).

So of course I bought all 6 refubs he had and sent them to my friend in China, who received it shortly and motor-muled them back to the states for me. :D

Now these are designed for aircraft use, meaning they don't feature any real way to attach a sprocket or pulley onto the motor... which is a bit diffcult for gokarting uses. (I have a burning "dislike" of set screws to).

Probably something this sized
Now to the week before Makerfaire as I was freaking out..... The solution starts with milling a 3mm keyway into the motor shaft, it being steel this required a carbide 4 flute endmill and a bunch of cutting oil. Since I didn't wanna disassembly the motors, protection in the form of a plastic baggie and tape was used to keep chips/oil out of the motor. (Always use protection)

Indicating! Takes long then cutting
Now personally I don't like cantilevering a pulley/sprocket/gear off the end of the motor shaft..... espically the former two (gears deflect less). Taking a page out of Shane's Tinykart I wanted to extend the shaft and support it in a bearing to to make sure everything was supported.

Solidworks solves all things
Well that wasn't to hard.... Using Razor Scooter hubs had the advantage of already having a 72TH HTD 15mm wide pulley built in. And with the desire of efficiency and quietness timing belts were the way to go. Drive ratio ended being a 16T to 72T giving a reduction of 4.5:1. Which with 8in tires gave a top speed of around 35mph at 12S (way more than needed). There wasn't a lot of math done for this but from past experiences and observing what others have done this should work out...

Some interesting design notes from this, building FIRST Robots I have gotten quiet of a bit of experince messing around with the Gates HTD and GT2 timing belts. Both are modified curvilinear tooth profile vs the traditional trapezoidal shape of XL/L/MXL/AT/STD/etc type belts. The Gates belts also use a fiberglass cord to keep them from stretching and are built with a neoprene body with nylon tooths. And are incredibly strong. HTD is the older design, which patents has expired so you see it kind of everywhere, while GT2/GT3 are the newest Gates offering and offer nearly 30-40% higher ratings for the same size/pitch belt. The geometries are so similar that GT2 belts work on HTD pulleys, and visa verse, of course this down-rates the possible max loading abilities. It's interesting to me how such a little change in geometry (so little they are backwards compatible) leads to GT2/3 having pretty significant higher ratings.


Anyone curious how to design and build things with belts and not have a bad time with them I would implore you to read the Gates Design Manual (200pg PDF) which goes into great details on how to make these things work happily for infinite life. Engineering! Math! Science! Numbers!  Yeah I should do more of those things...

So back to reality, the cheapo casted Chineseminum wheels have a 72TH HTD 5mm pitch 15mm wide timing pulley in the back of them, now to improve on what HTD can do. I used a GT2 490T Belt with a GT2 16T pulley on the motor shaft end. Using GT2 belts on HTD pulleys improves the maximum loading abilities to a degree, the exact amount of that "degree" is a bit of a gray area.... But according to the design manual all HTD parts/belts should be able to handle around 95 in-lb of torque. While a purely GT2 setup will handle around 180 in-lb, so using a GT2 belt and pinon (weak point) this setup should be able to handle somewhere around 130 in-lb of toque for life. Yep, Gates design guide numbers are for life, so you can exceed these numbers by a fair bit just your belt life decreased dramatically. With the gokart bring a short duty cycleish (watch me eat those words) I felt fairly confident in these numbers. This is also assuming perfect tension...

With timing belts axial alignment is key to making sure they work, and also making sure your pulleys spin concentric. The top view shows how everything is supposed to line up. With a tensioner that is *gasp* non-adjustable. Using maths in CAD I estimated the size of the tensioner needed, and it's a 3D printed piece of nylon ridding on a needle bearing. If my CAD guess is wrong, I'll just scale the print according.

Now to my favorite part of this the output shaft that couples onto the motor shaft and the pinnon pulley. Thanks to a connection gathered from my battlebot-ing I had access to something called at wire EDM machine. If you don't know what wire EDM is, think of as hot wire cutting of foam but for metals. Video below (for some reason everything I could find was old).


For designing things that I don't have an unlimited budget to fabricate (which is always), I always try to a plan or at least a technique in mind before CADing up something that requires a 10 axis CNC machine or something. Knowing I could cut some parts on the EDM meant that I can do some things I normally couldn't like.... billet pulley/shaft with a integral keyway!

 This is basically un-machinable with conventional tools. The neat thing about the EDM is that the wire is only .01 in diameter letting you cut basically square internal corners. And the machine is very precise down to .0005in +- and can hold perfect squareness even cutting tall stock. The plan was to take a steel rod, and machine a blank on the lathe, getting the OD of the shaft part to the correct fit in the bearing. And the pulley side oversized so i can have the wire EDM cut the pulley. A pilot hole will be bored though the center for indicating the EDM. Also a jig will be needed to be made for holding the part....

Unforantly I don't have many photos of this process since it was a RUSH job as I was running out of time on the build. Something like T-minus 7 days to makerfaire. And everything to shit.......... yay.

Around midnight while on the EDM, trying to cut the pulley part of the shaft the wire kept breaking.... and between 3 of us we couldn't figure out what was going on. So a re-design on the spot and re-cutting some parts was required..... (was there till around 4am..)
Thankfully we we are running a modern EDM with all the features
not as billet-y 
So this turned into a two part assembly, the shaft got the internal key and bore EDM-ed into it and the end shoulder got turned down soo... the EDM pulley that had a bore broached would press fit onto the shaft. After which I had it TIG welded together so they should never come apart.

See that's how weld should look like..... 
And now the big question... does it fit.


Oh yes! What happens when you like machine things to correct tolerances and shit. The integral key is great, no tiny keys to loose or to retain. Also around this point I got the belts in from SDP-SI and they fit the profile perfectly so everything was working out..

Friday, June 10, 2016

The 2016 MarkKart - The Beginnings

Again after a long lapse of blogging I am back!

The months of March and April were taken up by the fact a group of misfits and I built a 250lbs battlebot and ended up on Season 2 of ABC's reboot of Battlebots! That's a long story and I'll post a more in depth article on that when more of the NDA's get lifted.

But we filmed Battlebots up till the end of Apr, and due to being crammed into a huge hot sweaty room of roboteers we all ended up sick including me.... so after a recovery phase, I realized I had like 2.5 weeks to build/upgrade/do something for the Power Wheels Race at the Bay Area Makerfaire..... 

For anyone that doesn't' know yet, Power Wheels Racing Series  is a event hosted at various Makerfaires where teams show up and either mod a Power Wheels (kiddie ride) or build something that ends up looking like a Power Wheels for under $500. And race it around a small-ish track in the parking lot of a Makerfaire, and perform a skirt for audience votes to collect "moxie points".

So with the state MarkKart (or whatever it's called now) was left it needed some serious work. Burnt motor(s), way to high CG, handling issues and a frame that was 3 years old. 

The 2015 kart... 

And a dead Sk3 outrunner
So after thinking about it... a complete re-design ended up happening.... oh hi solidworks: 

Missing some bits.. but close enough
The CAD for Markkart 2016 have been in the works for a bit, but during the first week in May while recovering from robo-pox I got to a point where I was pretty happy and could start fabrication. It is the most gokart-y looking thing, I've built so far. It started out more chibikart like and kinda evolved into more of a 3/4 sized tinykart thing.... THANKS SHANE.

I'll break up the different parts of the MarkKart build in to various post (making this up as I go) to hopefully cover the project in greater detail then I usually do. (Charles' blog is the inspiration there).

Having always done bolt together alum tube extrusion frames on the past karts (I have a burning "dislike" of 80/20). I decided to try something new, and that is having a frame welded together for me. That's right, OUTSOURCING. Over the years welding is a skill set that has eluded me, and TIG welding aluminum is up there on the welding difficultly level. So to be able to get this done on time and with the quality needed, a ringer needed to be brought in thankfully we have an amazing welder at the local Makerspace that got the bid.  

Frame design was probably the easiest part of the CAD, all 1x1x.125 6061 square tube and all done up with right angle joints. With some round bar welded in for the seat mount (razor ground force seat).

Boring I know right
Yep pretty boring.
Overall dims are 30x40. To ensure it could be welded quickly enough everything was designed so all the welds were with same thickness material and butt joints at 90 degree angles. Basically the drive boxes bolt on the back. Spindles go into the front gussets a seat in the middle.

But Markkk this isn't what a gokart frame is suppose to look like...... 
A real cadet kart bare frame

To get philosophical for a second here..... I am well aware a square thing made out of box tubing isn't exactly consider a "real gokart" depending on what circles you run in. Due to limitations of time and everything else something quick and simple took precedence over everything else. Also round tubing used in real racing things, is a challenge to work with and with little experince in that area trying to bend and jig up a real ish looking frame just wasn't gonna happen. Also on a personal level this is project wasn't meant to build the fastest or the most "real" gokart possible, but something fun and silly. So yeah square tubing frame for now. Maybe something different next year...

A hindsight thought is I have learned a lot about gokart dynamics and handling over the course of being around PRS for a few years. Some of the teams are legit and have built some really cool stuff (photos later) and talking to them has taught me quite a bit.... the limitations of the MarkKart has always been my design abilities for vehicle dynamics but that's improving over time... (FIRST and it's skid steer sigh).

Anyways onto the build! First trip to the local metal yard for a bunch o aluminum.

Metal!
Then drilling the mounting holes needed for various gearbox and paneling bits on the Bridgeport.


So with welding, the biggest worry I had was making sure everything came out square. If you look at the design the front bar and the rear bar actually bolt on with gussets. This allows the drive system to come off and on easily and also provided a jig within the frame for welding. I was able to bolt it together, ensure square and then hand off the bars and part with a drawing to the welder. So he could weld in all the middle pieces. 

It's a rectangle
The black magic of welding
After about 3 hours of welding it was done! Honestly it went together faster then even I expected, and the final product was awesome! Everything within a 1/16 or better, and dead nuts square. 

Looks like the CAD model... weird how that works out..
Next was adding the paneling to hold the electronics and batteries, the 1/8 alum was going to be waterjet cut but they ran out of time on the machine so I ended up using the local CNC plasma machine. Not as clean of cuts but with some filing afterwards still works fine. 

CNC Plasma is stupidly fast
 Because I was worried about the holes lying up after welding, I didn't put any of panel holes in the frame. So had the plasma cut them in the panel, clamped it together and matched drill.

Only use for SLAs le
 Bind pop rivets are a personal favorite of mine, these are 3/16 aluminum ones. And with a $40 Harbor Freight pneumatic rivet gun they take seconds to install and make for a clean look since you can't see anything from the top.

 And it's done!


Notice the stockpile of spray paint in a photo above? Something I've learned is that just simply painting your projects makes them go 10x faster... well maybe not but it makes them look 10x legit. And makes other people think you're more legit.... since I was waiting on waterjet parts and various things to come in I figured ill go give it a try. Painting aluminum is always a bit tricky due to the fact nothing likes to stick to it. (Wanted to do powercoat but no time). 

From what I have learned, it's best to sand everything with a 300-400 grit disk sander to get the oxidation off the aluminum, this also buffs out most scratches and such. Then to lay down 2-3 coats of zinc based self-etching primer. Afterwards then 2 coats of your color. Paint of choice was rustoleum spray paint from the local Homedepot. 

Zinc primer is always greenish
That looks legit now eh. 

We'll see how this holds up, the real trick was letting it cure for 3 days untouched. As most paints don't fully harden for days so assembly will need to be carefully done....  At this time waterjet parts come in and back from coating! So fun times should be had teaser for next post:

Friday, February 26, 2016

The history of MarkKart

Been awhile since I've updated this blog... something I should change. But Lazy blogger I am.... Meanwhile the Markkart (the naming has changed around) has seen various actions and updates. List of Makerfaires it's been include:
  • Orange County Mini 2013 
  • San Diego Mini 2013 
  • San Mateo 2014 (PRS Race) 
  • Inland Empire Mini 2014 
  •  San Mateo 2015 (PRS Race)
  • San Diego 2015
Due to my schedule and lack of discipline documentation have been lacking. I hope to go though my photo archives and create some kind of timeline of various upgrades but here's a list of what I remember.
  • The first musings started back in my Sr. year of high school
  • And was mostly based off of Charles' ChibiKart that was a internet hit and it was finished for OC Mini Maker Faire.
  • So that version we'll call it V1 worked and was tweaked over the months, but was almost unrideable due to the hard rubber Colson wheels that made the smallest bump painful. So as San Mateo Makerfaire 2014 rolled around, which had the first PRS race I could attend a overhaul was needed.
So changes included getting rid of the two speed gearboxes in favor of one speed 2 stage drive modules. One gear reduction setup and then one belt drive. Otherwise real pneumatic tires were fitted so the ride was improved greatly. And MarkKart v2 was born

Much nicer drive modules

And the before photo

And the after photo

A theme that has happened is that my running gear always seems to shatter under the real power of the brushless SK3s. Also my origins in FIRST Robotics has taught me to make things that seem to only last for 15 minutes before something breaks..... A trend as time progress I stopped using the FRC parts that made things oh so easy. 

Also another issue I've had during the races was the play in my steering made handling a bit of a sketchy maneuver, and of course the brakes never worked. But the real power that is possible out of the brushless motors was felt for the first time. It was FAST.... to fast....

Fun times at Mateo

So then the next edition for the 2015 makerfaire was started.... upgrades now includes a more upgraded running gear, with beefier parts. A real racing seat, working brakes and steering that doesn't suck. 


So we can call this v3! All the silver parts (didn't have time to powdercoat) are the new addition and the racing seat. Also breaks have been moved to the back and WORK! Steering is much improved and it was all fun and games..... Till I melted a motor... Oops. So doing some math I realized for my 245kv motors I was geared too tall, and the extra stress on the motors caused melty things to happen. 
Other wise it was a fun kart, but getting to see what real gokarts can do in PRS such as Nimby and MB's creation has started to get the gears rolling....

So Makerfaire 2016.... TBD. 


Wednesday, February 24, 2016

Another FIRST Robotics Season in the books.

I am now sitting in 2016 at the end of 2016 FIRST Robotics  build season, and poking at the internet has made me a big nostalgic and wander back to this neglected wreck of a blog. Well let's get into it.

I just finished my 6th season of FIRST Robotics (would be 7 but i took an effective year off). This year's game sponsored by Disney (for marketing reasons). is STRONGHOLD. As seen below.


Looks pretty fun, and painful for field reset in my opinion. Anyways starting a FIRST team while in high school (3647) as taught me a lot of the engineer I know these. I ended up getting sucked back into it when I was asked to mentor 2485 WARLords. I was heavily involved in the 2014 season, took 2015 off due to work and school and came back in 2016 last minute.

First is probably the largest STEM type robotics program in the USA for high schoolers, after being a student, mentor and volunteer in the program for years I've had quite a few thoughts about it probably something I'll write up in another post. Anyways mentoring has almost taught me more than being a student on the team, 2485 being a mentor heavier team I get to do a lot of direct engineering and fab on the robot with an emphasis on making sure students are 100% involved and behind the process. This year's game is interesting due to the the points breakdown and the obstacles one has to drive over. Also in my opinion this has lowered the bar of entry as a robot that is good at driving over stuff can score points directly for the alliance.

The standard rookie drivetrain only robot... we all see and love.

But as 2485 is a team that wants to win, we get to do a bit more then just drive. With the strategy team leading the thoughts on what the robot should do and what are most important for winning matches/regionals/champs, there's a lot of debate on how to play the game. TLDR we decided on a tank treaded robot for driving over stuff, low profile to fit under the low bar, some fancy quick intake system/arm that also is used for pushing stuff, and a shooter to make any shot we desired.

First line of work was building the drivetrain, we ended up using a sponsor for most of the parts, Brecoflex. They make a line of self tracking belts with a the ability to add a backing material on the belt, now usually used as conveyor material these also happen to make good robot treads. a bit a bit pricy at $250 a belt and $40 a pulley.

With 5 pulleys on each side the center 2 are dropped and the rear ones are the driven. Drivetrain was mostly custom, including the gearbox powered with 4CIMs + 2 775pros. Overall this system has worked out pretty well. With tensioning issues solved by a egg-y cam type tensioner that runs on bearings in the middle of the belt run.


The intake was designed based on the oldddd Team 47? bi-directional intake that was popular in 2012. Using a main vertical string of polycord to suck the ball into the robot, but with side rollers with a crossed polycorb belt to pull a ball in from the side to the center. Vex Pro VersaPlanetary runs the show (great little gearboxes IF assembled right).


This team also likes its composites, the CF is a one/two layer wrap around the alum welded frame. And the Kevler is wrapped around a UHMW tube lathed down. Though at this point it's mostly for looks and for the experience of the students. The front roller was later replaced with one without the kevlar, due a small re-design.

Lifting the intake is a 140:1 gearbox and a 2:1 chain stage. This proved tricky since we did not have as much mounting support for the gearbox as desire and we wanted to get rid of as much blacklash as possible.


As one can tell by the lack of coating on the gb... it was re done in 14 hours during the last days of build season due to original um sucking as I would put it lightly. (Yep my oops... of the season). With a single 775pro driving it through a base VersaPlanetary stage it worked out pretty well. And as more than enough power to lift and hold the arm. Lastly a MA3 US digital encoder attached directly to the arm runs the show. 

For the shooter design we went a safe route, simply flywheel and compression. 2 775 pros in VPs spin up 3 colsons up to 6000rpms and a delrin rail system guide the ball. It has adjustable release angles and folds down to clear the low bar. It took us a lot of effort to get everything to spin happily, the gearbox and belt and bearings from Vexpro were finicky to say the least, as I said earlier the VersaPlanetarys are great if you put them together just right which can be challenging.... also in these high RPM systems we found looser belt tensioning is better than tight and lasty chinese bearings can suck (ABEC ratings exist for a reason). Using SS open bearings with a ABEC-1 rating worked the best and we are able to get to speed quickly.

A "teeter totter" pneumatic operated ball holder/handler fed the single ball into the shooter when we desired to. These parts of the robot were the ones I was least involved with in the design and fabrication bits so I kind of have a lack of photos here. 

That all combined together results in Orion. 


Wednesday, September 17, 2014

New Quadcopter Viideos!

Before I write up the actual build here's some of the video I shot over the summer with the new quad. GoPro Hero 3+ Black with a custom build Alexmos 2axis gimbal.


Friday, September 5, 2014

MarkChibi Part 2

Wow... it's been awhile blogsphere. Life things have kept my busy with some sporactic working on projects in between. But MarkChibi has been finished! And rebuilt several times...

The original design involved 2 speed gearboxes from the FIRST Robotics world, dog shifters made by West Coast Products. They basically have two gear sets inside and then you choose which one you want to engage with jamming a "dog" gear with teeth into which set you want. They work great in the FRC world but with the much higher power and the lack of pneumatics on the karts it didn't pan out....


This was the first setup the night before OC Mini Makerfaire 2013, which was the deadline for the first built (yeah that was a while ago...). In the end it was locked in low gear and ran the even great. And some more "product shots" below. I guess in my rush to finish the cart I didn't really take many in process shots...... 


Steering... this will be something that gets talked about more. 

Fancy shot

So a few things learned after this.... need a better solution for shifting or just do away with it. Brushless motors have plenty of toque. Colson wheels without suspension on anything but the smoothest concert required painkillers, and the brakes.. to say the least need some work. 

 More to come later.