So our school as an math open house event, which is the same thing as a science far but instead of science it is all math projects with Calculus and Mathematica programming. Being the guy with a new CNC laser to play with, a robot with an acrylic base was the logical choice.
Simple and effective, acrylic laser cut base with 2 L brackets for servo motors, lathed Delrin sliders and an Arduino as the brain. Now to get my Mathematica points [which were required] the brute of the programming that runs this was done in Mathematica and the than a serial comm link ferries the data to the Arduino and then servos.
So most important bit of the game this year, getting balls to go into hoops. Simple Right? Fuck no.
The most common and "easiest" shooting mechanism is a one or two wheel baseball pitching machine alike. Either using two wheels or a single wheel with some sort of hood, then just a roller to get the ball close enough for the shooter well to grab onto it and fire. Again sounds easy right, and again the answer would be no.
So what was wrong with version 1? Shooter gearbox was cantilevered out way to far adding to much vibration to the system, there wasn't enough reduction for torque, PID never got implanted fully, feeding was a guessing game, hood wasn't optimal, not even close to enough testing, and the whole assembly was a massive pain the butt to work on. In the end the system did allow use to score a few 2 pointers per match at best, but I wanted 1717 like 3 pointers...
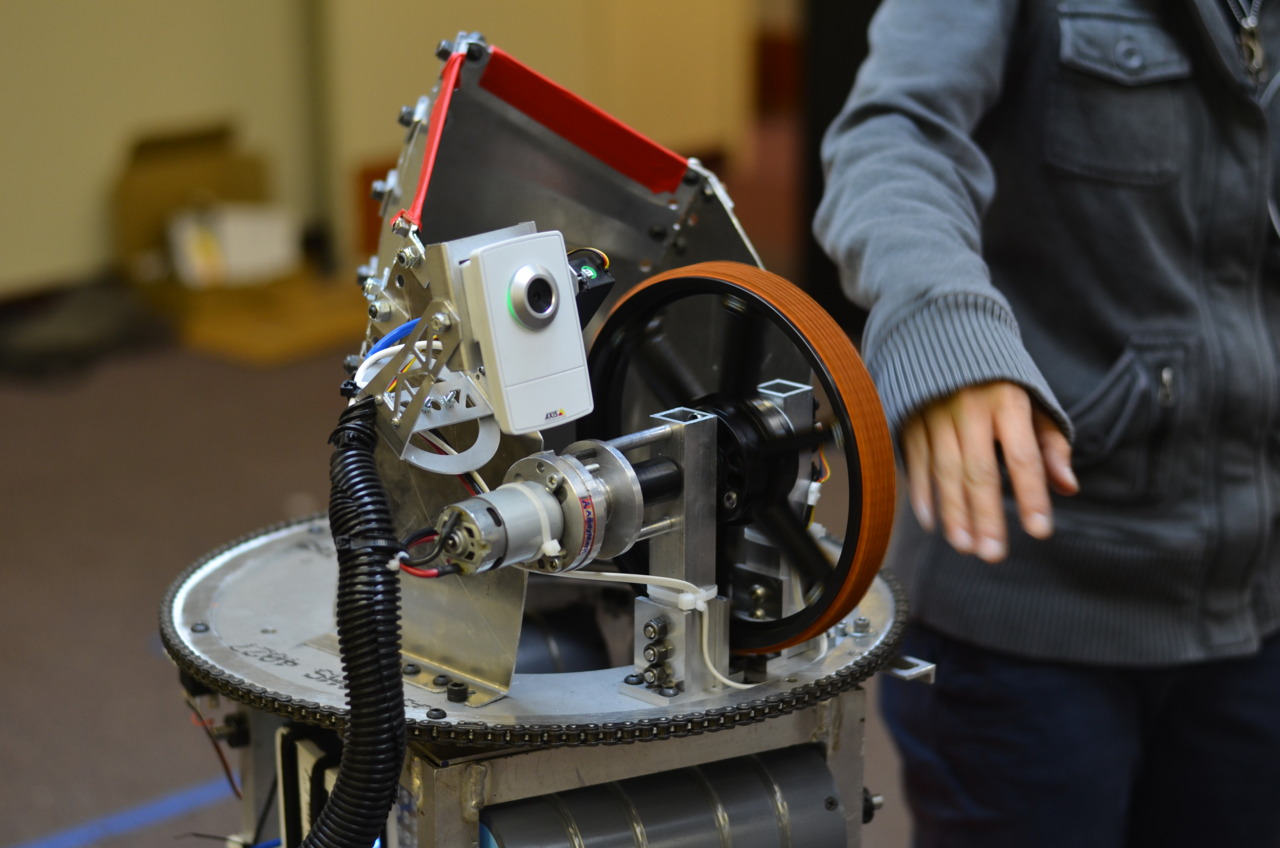
First thing that was done was while the sheet metal hood while a cool concept it was scrapped and replaced with a 1114 two angle lexan hood. This allowed for key and fender shooting and was lighter. Very simple and very effective. It was also machined out more carefully and less last minute, which turned out to be pretty nice.
Now the angles probably need a bit of tuning for the most optimal shooting performance but that rickty gearbox needed to go before any testing was done. After having to deal with how annoying the first revision was to work on revision two was to have a cantilevered wheel, and the whole assembly was designed so that anything could be removed quickly and without frustration; motor can be replaced in 2 minutes flat. It was designed, as everything should be, in Solidworks and changed a million times before ever reaching a drawing file. The design was pretty simple, using the L-brackets and the bolt holes from one of the stand offs on the old shooter; a new gearbox made up of two plates, 5:1 single stage gear reduction and a key slotted shaft was born.
Also at this time we got our sponsorship with Makerplace going and with access to full size and precise bridgeports/lathes, machining consisted of 4 parts. 2 Plates, 1 Box, and 1 shaft, this ended up taking 11 hours..., working to be faster at doing this is something on my to do list...
Well the easy part was done, a solid gearbox and shooter assembly with a good amount of reduction and a top end measured speed of 4100RPMs, now to give it a close loop control system. There is a EP4 4x optical encoder mounted on the back of the gearbox, using a basic PID loop designed with velocity in mind [thanks 399!] and swaging some constants values eventually it basically worked. I will spare the technically details of this for another day because even for me it wasn't very fun.
With all of the above, we can score a whole lot better:
But that doesn't mean it is done, everything keeps iterating. The shooter PID needs a setfoward constant or something to help it spin up faster, with 330watts of power behind it it shouldn't take 4secs to spin back up. And the biggest issue left is the feeding. The belts just power the ball into the shooter, the issue is depending on where the ball is sometimes the balls go into the shooter faster then the last one. This of course results in inconstancies [seen in the video], and needs some kind of mechanical ball loading system.
One fateful day while roaming the vast Internets I came across this: youtube link
Of course I wanted to build one after the first 10 secs of the video... and then a few weeks later: Instructables
So after some pondering, and misguided thinking [always fun] it turns out this is something I could do, provided I get the funds. Makerplace has all the machining I would need for all the parts, the CAD model I can re-create and tweak a bit to fit something more to my tastes and tooling. And anything I didn't know/couldn't figure out can be redeemed by a few hours online, seeing there is quite a few people into this.
Personally a Solidworks user, a few hours in CAD and:
For anyone that has never used 80/20 it is cool stuff, being able to bolt anything to it without drilling holes is a bit of a god send. Of course the downside it is heavier then box and is a bit more expensive but for a project this small well worth the convenience. The frame is held together with 1/4 plates on the corners that double as wheel mounts. The main machining work that needs to be done is just 2d work on 1/4 and 3/16 inch plates. However unlike the DPRCibikart I have redesign the wheel and motor mounts with blocks and L brackets because I have access to a full sized mill. The steering "wheel" is something I might play with around more. And I am considering making the entire frame a bit longer but need to figure out the ergonomics of that first.
Electrical wise a pair of TURNIGY SK motors and controllers makes the round thingys in the back spin really fast. The exactly motor and controller combo is still up for debate, personally I want something with more power then the DPRC, but we will see how far I can stretch a budget and how feasible it would be for me to wire/program a Hall effect sensor. Using FRC CIM motors, gearboxes and controllers was considered for a bit but figures seem to show that buying all of that vs buying what I need for a brushless setup would require the same budget and the brushless is more effiecent and lighter. That leaves the problems of batteries which could be a whole post on it's own so lets not go there. Just suffice to say there will be 15-20AH at 24vs providing the power.
I also need to do some math to figure out what kinda reduction and wheels to put on, as this is not a blatant copy of the DPRC [okay maybe it is...], going to 6inch wheels with more reduction sounds like a good idea, or maybe not need to figure that out. Since 6 inch wheels allows for more reduction without loosing top end speed which should result in more torque. Personally my first goal with this is to make something that will give me a heart attack every time I or anyone comes near the pedal; quite a immature goal I know but I can't help it. I like speedy things.
The only problem in all of this is money, it an't cheap. About $800+ it is quite the under taking in the world of things I have done. With FRC being funded mostly by sponsors this is going to require some piggy bank cracking.
With build and competition season over I have finally been able to catch my breath and get some thinking done. The season was mine and the team's second year in FRC and holy crap was it a crazy. The game reverted back to balls which opened the gates on past knowledge; first has done an number of ball picking and shooting [2006,2009] games before and many of the robots, including ours, had designs familiar to many.
Currently in off season mode, we are redesigning/rebuilding anything that could benefit improvement, iteration for the win. The robot that was used for the regionals... well lets just say a lot has changed since then. Photo from the end of build for reference:
The first iteration was the result of the 6 weeks of build season, and for me at least left a lot to be desired. Now because we are poor [Engineers cannot write] we were only able to attend one regional, so off season started right after SDR. After a quick assessment the rebuild started. And with the help of the slice of heaven known as makerplace new parts began to take over.
Following post and rants should detail the revamp...